Installing a GNS3 Server
Although GNS3 can run local on your computer and you can use VMware Workstation and have the GNS3 appliance. I found it much more stable and predictable to run GNS3 on a dedicated server. Using this type of installation, all the projects, and images are stored on the GNS3 server, so I can install the GNS3 client any computer and get access to the same projects I was working on. You can also have multiple people working on different projects that are on the same server. I find that neat for educational use or if you where helping someone with a project. In this post I’ll walk though the steps needed to set up a GNS3 server.
The first thing we need to have is an Ubuntu server 16.04.4 operating system installed, as of writing this GNS3 server only supports 16.04.x LTS, some people have had issues with using Ubuntu’s 18.04 LTS which was released in April of this year. We are about halfway through LTS cycle with 16.04 with support ending in April of 2021, still got time. ;) Once you have Ubuntu server 16.04 installed and a static IP address assigned we now need to run the GNS3 script, move to the tmp folder.
cd /tmp
curl https://raw.githubusercontent.com/GNS3/gns3-server/master/scripts/remote-install.sh > gns3-remote-install.sh
bash gns3-remote-install.sh --with-openvpn --with-iou --with-i386-repository
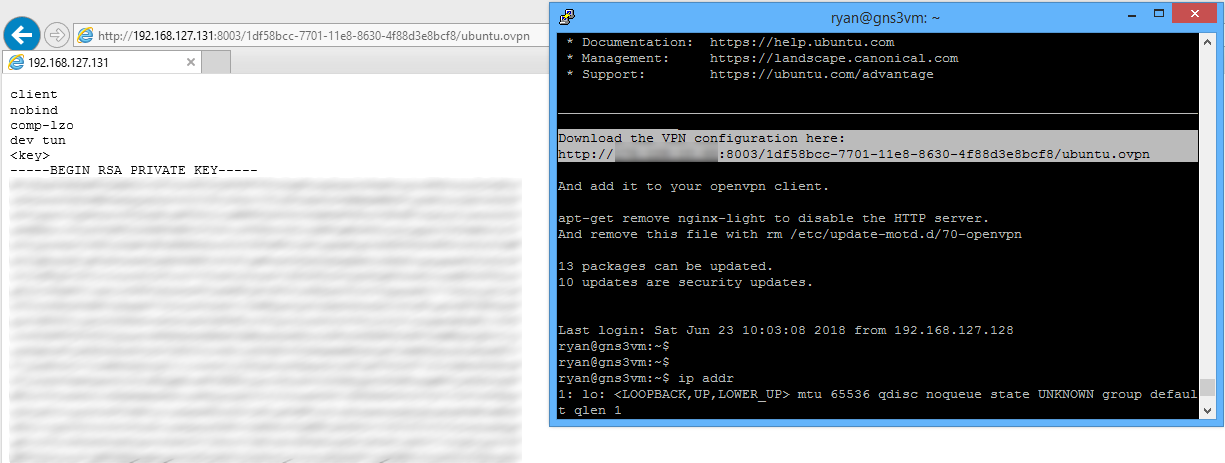
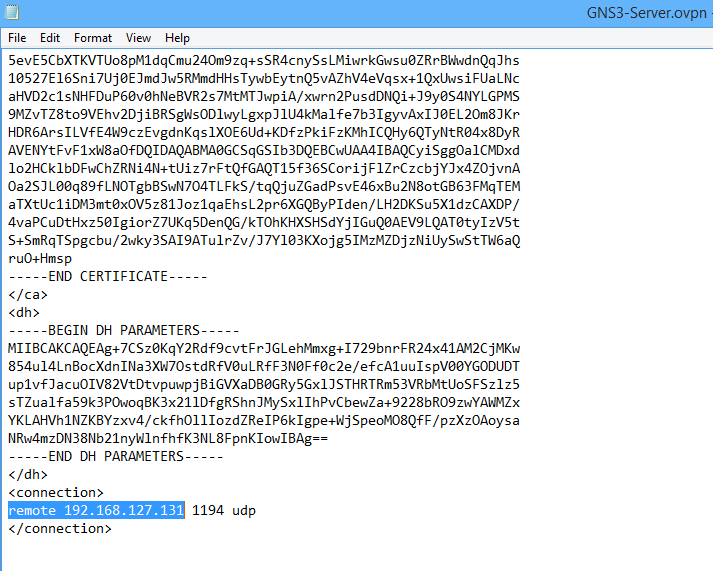
Depending how you are connecting to the GNS3 Server you might need to edit the OpenVPN configuration file. If you will be connecting from the Internet it will probably work, like if you are using a hosting provider like Packet.net, AWS or your own ISP. If you will normally be connecting from your internal network which is mostly likely the case, you need to edit the bottom of the OpenVPN file to the statically configured IP address you configured when you installed the Ubuntu operating system. In this example the GNS3 server internal IP is 192.168.127.131 so I’ll edit the file with a simple text editor.
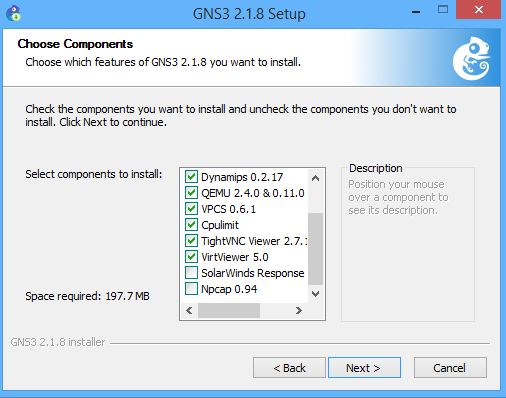
Once that is done we should be able to connect to our GNS3 server using the OpenVPN client. When you configure a GNS3 server you must use the OpenVPN regardless if you are locally on the same network or over the internet. We are now ready to go ahead and install the GNS3 client on your computer. In this example I'm using Windows, the GNS3 client can also be used in Linux. When you download and install the GNS3 client I usually leave everything at the defaults except the SolarWinds and NCAP most of this stuff is already on the server and I let the installer do the rest.
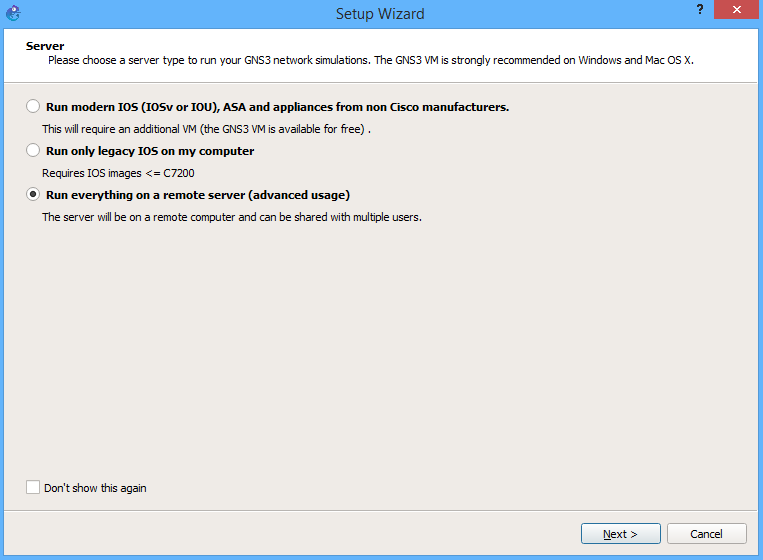
After the installation is finished go ahead and start GNS3 the first time, you are greeted with a Setup Wizard window. We are using a GNS3 server, so everything is going to run on it. Select the Run everything on a remote server (advanced usage).
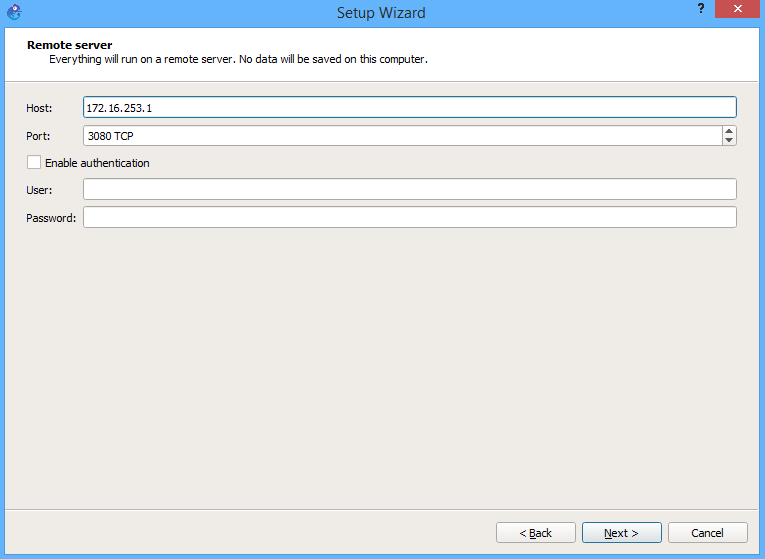
Another screen will want to know the IP address of the server to connect to, you need to use the OpenVPN IP address of 172.16.253.1. By default there is no user authentication, also before selecting next make sure you are connected to the GNS3 server with OpenVPN.
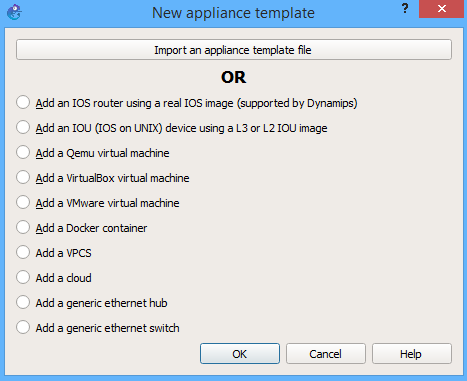
After selecting next GNS3 will verify it can connect to the server and then ask you if want to start importing appliances into GNS3.
You now have a GNS3 server ready to go, everything runs on this server, your projects, images and any snapshots all run on this server. When there are updates to GNS3 a simple sudo apt-upgrade command will update server and any GNS3 components automatically the only thing you need to do is update your GNS3 client so that the version match on both sides. Some things I noticed when using a GNS3 server is that is changes your host name when you run the GNS3 script but does not change the host file on the server so you might notice when you attempt to shut down or reboot the system, or do any sudo commands it can sometimes hang for a bit, and you get this message:
sudo: unable to resolve host gns3vm\[/code\]
sudo nano /etc/hosts
sudo password for ryan:
127.0.0.1 localhost
192.168.127.131 ubuntu
127.0.0.253 gns3vm