Cisco FTD Standalone

No management centers here, sometimes a standalone firewall is all you need. In this post I have a FTD appliance and there really isn’t a need tie this into Cisco’s Firepower Management Center. So we’ll configure appliance in standalone mode and go through the initial first steps that are required to get it online and walk through Firepower Device Manager. If you worked with Cisco FMC you’ll find its pretty similar, so with introductions out-of-the-way let’s get started!
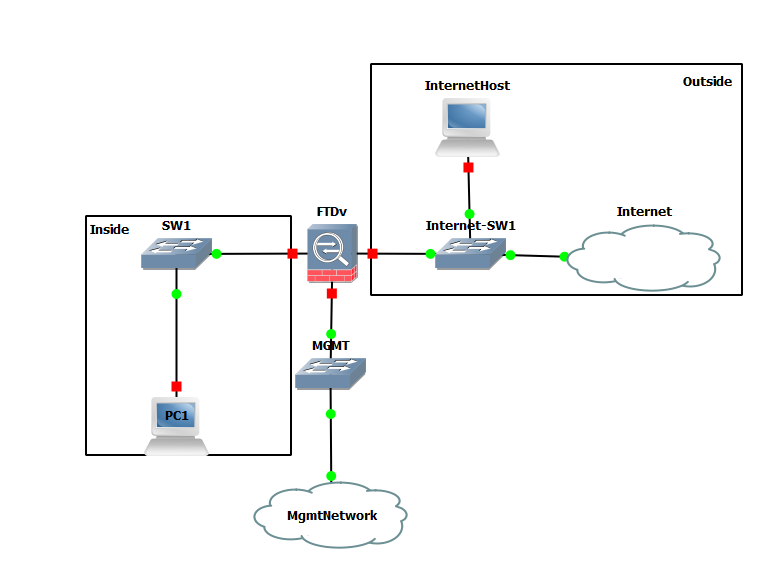
You are still recommended to have a management network connected to this appliance, here is the topology for this example, thanks GNS3 ;)
On first boot you must give the appliance some minutes to boot up when you first turn it on. It starts a first boot process which goes through building and setting up everything it needs. Once the unit is primed and ready you should see a login prompt, login with the default username and password which is admin/Admin123 the appliance will go ahead and display a EULA, agree to it and then the system will want you to change the password. You will then be walked through the initial setup of setting up your management IP address, gateway, DNS servers and after that you will be asked if you want to manage the device locally, since we are not using a FMC make sure to answer YES.
Once the device is ready to go, connect via HTTPS to the management IP address of the appliance with a web browser, and login into the system with the password you configured.

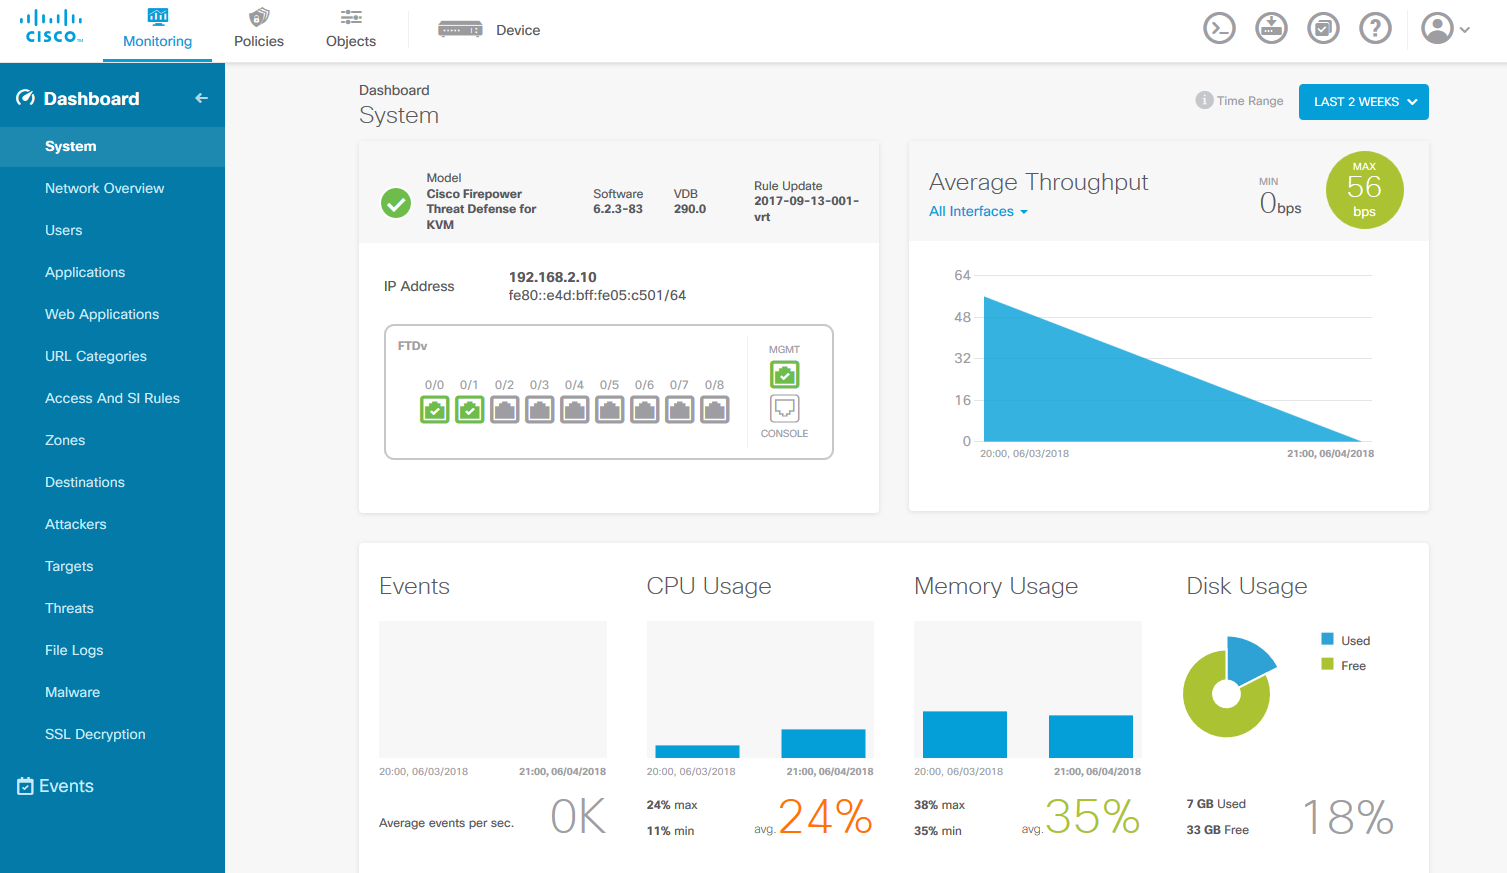
When you first login the setup wizard will walk you through setting up two zones, and inside zone and an outside zone. Or you could skip this step if you scroll down to the bottom of the page. This is helpful if you don’t have internet connection or if you simply want to configure this yourself. In this example I accepted all the defaults. Once you are done with the initial setup screen you will be directed to the main dashboard.
Believe it or not your now are ready to configure this appliance, if you used the FMC before this has the same wordage so it’ll be familiar to you. If you never worked with FMC or any of these newer Firepower Threat Defense firewalls it might be a learning curve but the built-in help on this is useful, and it’s a good starting point. You can also tie this into the Cisco Defense Orchestrator which is a cloud-based paid tool to help you apply polices to multiple devices. This is nice, so you don’t have to manually configure each device, kind of like a slimmed down version of the FMC.
If you have worked with Cisco ASAs you’ll notice that you can’t just copy the running-config and paste it on new device. These things are complicated underneath the GUI, which is also why you can only use a GUI. They have everything, but the kitchen sink essentially, basic firewall rules, URL filtering, IPS, identify policies, security intelligence feeds, file polices and SSL Decryption. That stuff just doesn’t work with a static config file and really can’t be configured via CLI like our old friend ASA/PIX. Although sometimes annoying it is the direction the industry has moved into, however, if you are still having a hard time and need to reminisce this appliance does offer a CLI pop-up, but it only offers packet-tracer, ping, some show commands are available and trace route. It's not much but it may be enough to move forward, good luck. ;)