Configuring Rancid
In my last post I talked about Installing Rancid on Centos 7 so be sure to check that out. In this post we now want to actually use Rancid so I’ll walk through on how to setup Rancid to login into network equipment and get configurations.
To recap: Rancid is a great tool to help monitor a device configuration for any changes. It also keeps track of them by using CVS (Concurrent Version System) for backups, so you can go back and compare versions or revert to a previous configuration. Rancid supports multiple hardware from Cisco, HP, Dell, Juniper and more. This is all open-source so you can create custom scripts or add commands to really make this a personal repository that fits your company.
Rancid has a couple of areas that need to be edited before we can let it run. The first area is the router.db file. This file is in each “group” or folder that rancid stores. In our example we have two groups’ routers and switches. This file has all the devices you want rancid to keep track of. We must edit this file with either the DNS name of the device or IP address. To do that go to the following:
Login into Rancid with the Root account followed by su – rancid Type of Device is the “group” you configured the List of Groups under the rancid.conf file during the installation
nano /usr/local/rancid/var/{Type of Device}/router.db
# This is an example of a router.db fle in Rancid.

# Location of File /usr/local/rancid/var/Routers/router.db

# Type the Router name or IP followed by the type of device. (Rancid supports more than just Cisco)

# Personally I think it looks better with DNS names.

Router01.example.com;cisco;up;

# You can also mark a device as down. This will cause Rancid to skip it.

Router02.example.com;cisco;down;

Router03.example.com;cisco;up;

# Of course you can also comments throughout this file or alongside devices for notes.

# Edge Switches for Computers at HQ

Switch-HQ-Edge14.example.com;cisco;up; LOCATION: Server Rack A

Switch-HQ-Edge07.example.com;cisco;up; LOCATION: Room 101

Switch-HQ-Edge21.example.com;cisco;down; LOCATION: Building A (Under Construction)
Once you add the all the devices in each Router.db we now need to look at the .clogin file which is located (/home/rancid/.cloginrc) this file will store the usernames and passwords for each device, this file supports wildcards so if you have a good naming scheme use it! I have had luck with commenting out everything in that file and just starting at the bottom of the file with my custom configuration, such as:
# Custom Configuration at the bottom of .cloginrc

# No Enable Prompts

add noenable Swich-E-Edge05.example.com 1

# Connect to All CORES (Notice the wildcard, remember you still need to add the full name to the router.db file.)

add user S-core0*.example.com username-goes-here

add password S-core0*.example.com password-goes-here

add method S-core0*.example.com ssh

add noenable S-core0*.example.com 1

# Connect To All Campus-5-Edge Switches

add user Switch-C5-Edge*.example.com username-goes-here

add password Switch-C5-Edge*.example.com password-goes-here enable-password-here

add method Switch-C5-Edge*.example.com ssh
/usr/local/rancid/bin/rancid-run
nano /usr/local/rancid/var/logs/{Type of Device/Group}
starting: Sun Feb 15 18:01:56 MST 2015

Trying to get all of the configs.

All routers sucessfully completed.

cvs diff: Diffing .

cvs diff: Diffing configs

cvs commit: Examining .

cvs commit: Examining configs

ending: Sun Feb 15 18:02:45 MST 2015
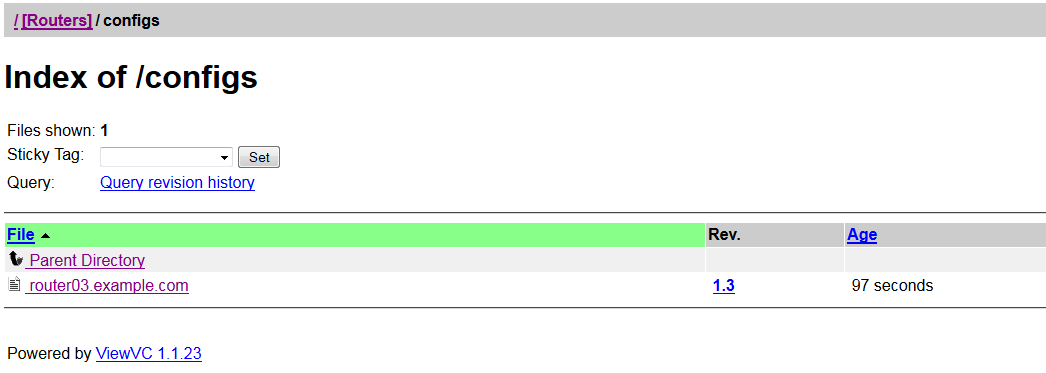
Screenshot of Rancid in ViewVC, using Router03 as an example.
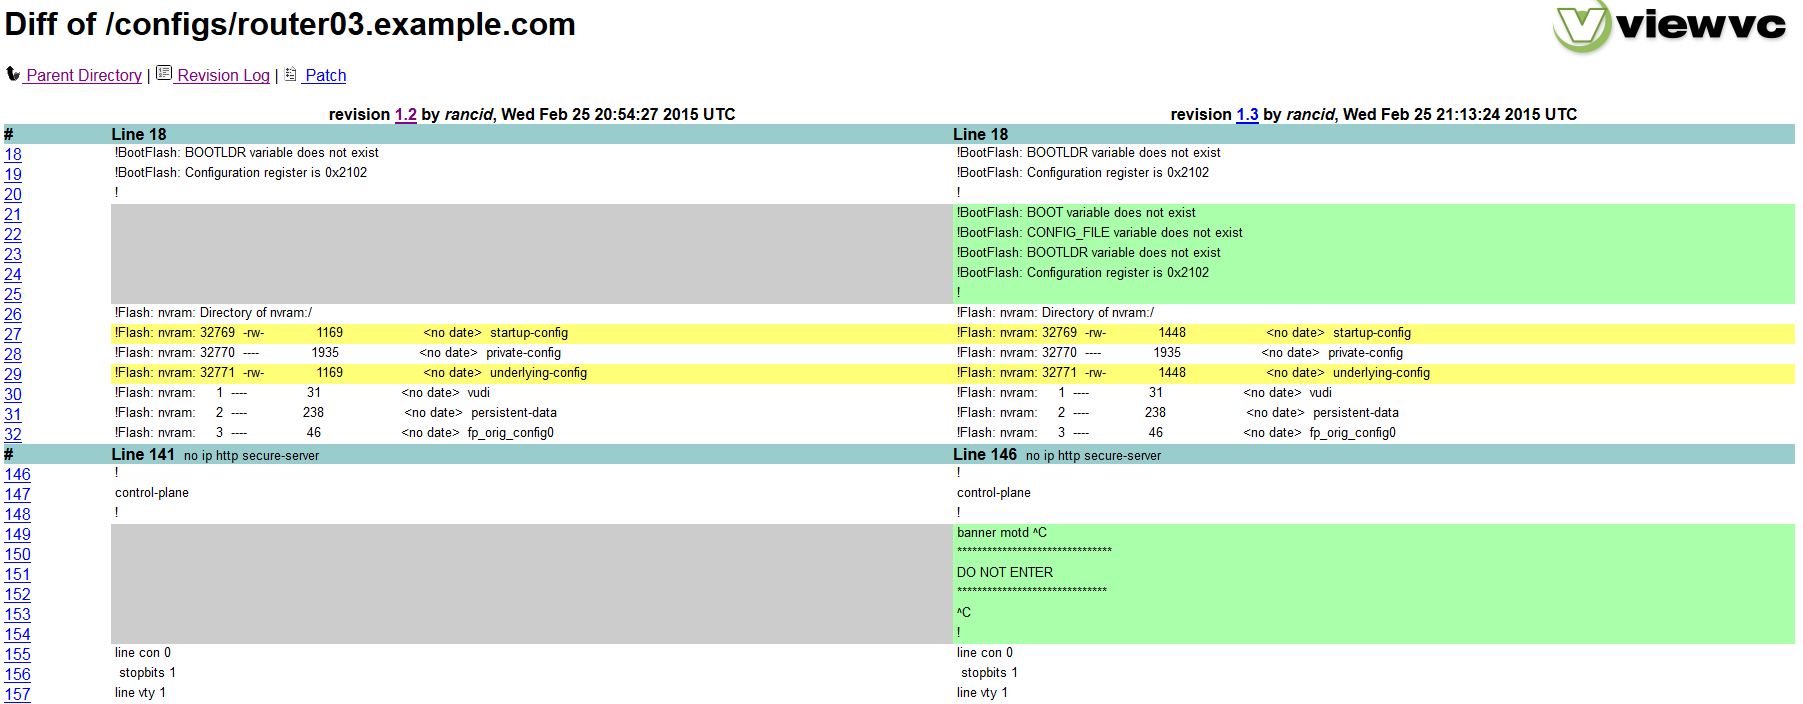
Diff between revisions on Router03.
One of the last things to do is to setup a cron job to run rancid, it depends on your environment but in this example I'm running the rancid job every hour on the hour. I'm also clearing the log files every five days but running the job every day day at 11:50pm. Below is my example of the cron job. Make sure you in the rancid account (su - rancid) and then type crontab -e. Note you will be using vi so here is a crash course once you in the file type "i" for INSERT MODE type out the configuration once you are done type Escape key followed by ":wq" which will write (save) and quit the vi program.
#
# Rancid User Crontab File
#

# Begin Hourly Router Dump
1 * * * * /usr/local/rancid/bin/rancid-run

# Begin Cleanup of Differ Logs Every 5 Days
50 23 * * * /usr/bin/find /usr/local/rancid/var/logs -type f -mtime +5 -exec rm -rf {} \;